четверг, 4 января 2018 г.

Vanilla Bean Cupcakes

I get so caught up with trying to create new cupcake flavor combinations that I often forget that sweet simplicity is still insanely delicious. So after countless requests from readers, I am finally sharing a basic vanilla cupcake recipe.

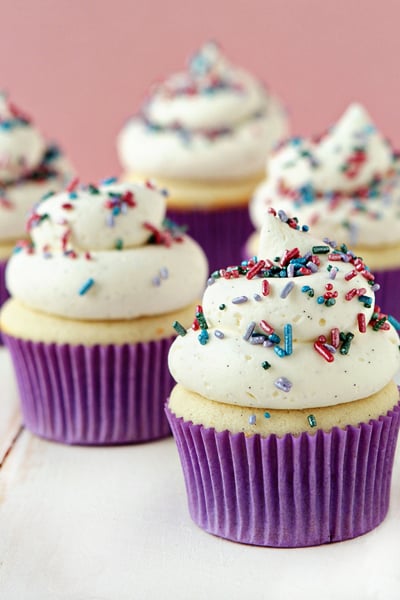
I tried a few different recipe adaptions in search of vanilla bliss and after a couple of test batches, I think this recipe may just be one of my favorite combinations to date. It starts with a vanilla bean infused white cake that has an incredible crumb. It’s light, fluffy and is the perfect foundation for a huge dollop of vanilla bean buttercream.

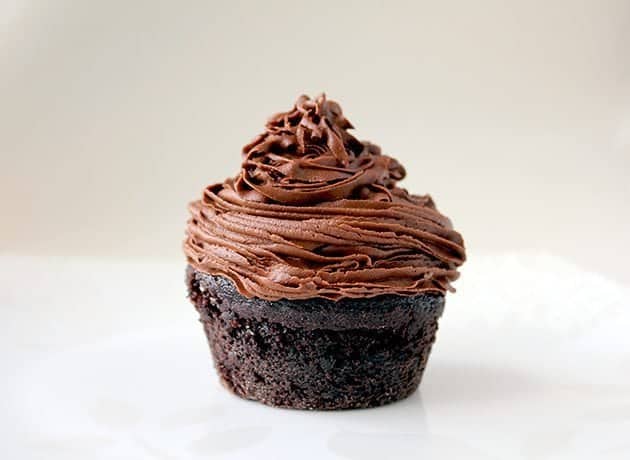
Although this combination may certainly be a little traditional, it’s anything but boring. In fact, my dad, a die hard chocolate fan fell in love with this cupcake immediately and said it was one of his new favorites.

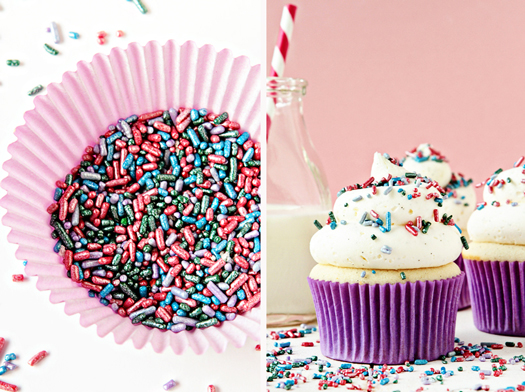
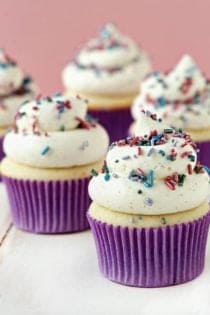
Jazzing these babies up with bright liners* and a sprinkling of pearlized jimmies*, makes them sassy enough to serve for any occasion. And there you have it, my absolute favorite vanilla on vanilla cupcake recipe.

Vanilla Cupcakes

  • 2 1/4 cups cake flour (I used Swan’s Down brand)
  • 1 tablespoon baking powder
  • 1/2 teaspoon kosher salt
  • 1 1/4 cups whole milk, room temperature
  • 4 large egg whites, room temperature
  • 1 stick (8 tablespoons) unsalted butter, at room temperature
  • 1 1/2 cups sugar
  • seeds scraped from one vanilla bean
  • 2 teaspoons pure vanilla extract
  • 3 sticks unsalted butter, softened
  • seeds scraped from one vanilla bean
  • 2 teaspoons clear vanilla extract (this helps maintain the bright white color)
  • 1 ½ pounds (24 ounces) confectioners’ sugar, sifted
  • 4-6 tablespoons heavy cream or milk

Directions:

  1. Center a rack in the oven to 350°F. Line cupcake pan with paper liners.
  2. In a large bowl, sift together the flour, baking powder and salt.
  3. In a medium bowl, whisk together the milk and egg whites.
  4. In the bowl of a stand mixer fitted with the paddle attachment, or with a hand mixer, beat the butter, sugar and vanilla bean seeds at medium speed for 3 minutes, or until the butter and sugar are very light. Add in the vanilla extract and one third of the flour mixture, still beating on medium speed. Beat in half of the milk-egg mixture, then beat in half of the remaining dry ingredients until well incorporated. Add the rest of the milk and eggs, beating until the batter fully incorporated and smooth, then add the last of the dry ingredients.
  5. Once ingredients are thoroughly incorporated, give the batter a good 2-minute beating to ensure that it is thoroughly mixed and well aerated. Using a large scoop (about 3 tablespoons), distribute the batter between 18 muffin wells, filling each well 2/3 full.
  6. Bake for 18-24 minutes, or until a toothpick inserted into the centers come out clean. Cool on wire rack.
  1. In a large mixing bowl, cream butter and seeds from vanilla bean until fluffy. With the mixer on low speed, slowly add in confectioners’ sugar, and continue beating until well blended.
  2. Add in vanilla, and 3 tablespoons of heavy cream or milk. Blend on low speed until moistened.
  3. Add an additional 1 to 3 tablespoons of heavy cream or milk until you reach the desired consistency. Beat at high speed until frosting is smooth and fluffy.

Follow Jamie on Instagram. We love to see what you're baking from MBA! Be sure to tag @jamiemba and use the hashtag #mbarecipes!

This post may contain affiliate links. We are a participant in the Amazon Services LLC Associates Program, an affiliate advertising program designed to provide a means for us to earn fees by linking to Amazon.com and affiliated sites.

Original article and pictures take http://www.mybakingaddiction.com/vanilla-bean-cupcakes-recipe/ site

среда, 3 января 2018 г.

Healthy Breakfast Frittata

How are your last few weeks of summer going? I hope you’re soaking up the rays whenever you can! If you read my blog you know that the month of July we were pretty much traveling the entire month. I decided that I would relax a bit, enjoy some indulgences, and just mainly workout outside for that month. I wanted to really take in and enjoy the experiences without my usual high expectations for workouts everyday. It worked out wonderfully on one hand – we hadn’t seen our family for a year and a half so the two and a half weeks that we were with them I really enjoyed every moment. On the other hand – I found myself anxious without my daily routine. My Mother is also an amazing cook. It doesn’t matter what she makes – it just tastes better! You know what I’m sayin? I think I lived one full day on her Banana Chocolate Chip Muffins! Don’t judge me, one day in a year and a half isn’t going to kill anybody! lol! Okay, maybe I’m still a bit sensitive about my over-indulgences. Long story short, I had a great time but it feels so good to be home and in my routine. I took the last two weeks to literally work and workout (using the Bikini Body Program). I feel back to my normal self and have lost my vacation pudge! It feels good, let me tell you!

So, I’ve also updated my office.

I figure I work here at least 12 hours a day I deserve a comfortable chair and an office that reflects myself. Check out these pics:

DAMY Health Office
DAMY Health Office
DAMY Health Office2
DAMY Health Office2

This is my office Buddha that sits under my Ginseng Tree.

I just love it.

DAMY Health Office Ginseng Tree

I’m also obsessed with this new wine!

You must get it if you like a clean fruity wine! It’s Moscato by Barefoot.

Moscato Barefoot Wine

Loving daily beach trips.

In the evenings after work we’ve been trying to go to the beach for at least an hour to decompress and take in the summer. It’s amazing what an hour a day can do for a person!

Amy Layne Going to the Beach

Gorgeous sunsets in Vancouver.

We’ve also been taking in some gorgeous sunsets since we’ve been back – taken from our patio. Check out this evening’s view!

Vancouver Sunset View

So, since being home it’s been a challenge to get back into the swing of cooking every meal. I’m telling you when I say I’m spoiled when I go home to see my mother. It doesn’t even begin to describe it! It’s like I forgot how my real life is! lol! So, to make life easier I made this awesome, simple throw together Healthy Breakfast Frittata that is just as delicious the next day as it is fresh. I do recommend if you’re going to have it the next day to heat it in the oven on low heat instead of using a microwave or anything like that. This is something that you could make the night before or for a couple days to make your mornings run more smoothly. There’s no more excuses not to have a delicious healthy breakfast every morning!

Healthy Breakfast Frittata

Makes 4 Servings

Ingredients:

  • 2 Cups Eggwhites (I use eggwhites from a carton to make my life easier)
  • 2 Whole Eggs (this is optional but I like the healthy fats, vitamins, etc)
  • 1 Head of Broccoli Finely Chopped
  • 1/2 a Small White Onion Finely Chopped
  • 2 Cups Spinach (not packed)
  • Garlic Salt (sprinkle)
  • Cayenne Pepper (sprinkle)
  • 1/4 Cup Grated Gouda Vegan Cheese (you’re free to use regular Gouda, Feta, or any light hard cheese)

Directions:

  1. Preheat oven to 425 F.
  2. Place all ingredients in an 8×8 previously oiled baking dish sprinkling your garlic salt and cayenne pepper on top.
  3. Using a fork fold ingredients together.
  4. Place baking dish in the oven and bake for 20-25 minutes.
  5. Using a fork poke the middle of your frittata to make sure it is cooked the entire way through.
  6. Remove from oven and cut into squares.
  7. Enjoy!

Note: Feel free to double this recipe or add mushrooms, peppers, or ground turkey. Have fun with it!
DAMY Members: This is an awesome breakfast, meal 4 or supper. 1/4 of the 8×8 dish is your serving size.

Vegan Gouda Cheese
Vegan Gouda Cheese
Amy Laynes Healthy Breakfast Frittata
Healthy Breakfast Frittata
Amys Blog Signature

Amy Layne is a Personal Trainer, Holistic Nutritionist and Lifestyle Expert at DAMY Health. She is the creator of the popular DAMY Method Program and world famous Bikini Body Program. To see Amy’s Before and After Photos and DAMY Member Success Stories Click Here.

Original article and pictures take http://www.damyhealth.com/2011/08/healthy-breakfast-frittata/ site

вторник, 2 января 2018 г.

Gingerbread Cupcakes

Gingerbread Cupcakes - Lady Behind The Curtain
Add these festive Gingerbread Cupcakes to your holiday menu.

These gingerbread cupcakes are spicy and moist but wait until you taste the frosting. The frosting is made with browned butter. If you have never made browned butter I highly recommend you go out right now and get some butter. Once you try it you’ll never want to make frosting with “just” butter again. What’s browned butter you ask? It’s when you take butter and boil it until it becomes a light brown color with a nutty flavor. It’s AWESOME!!!

So, just to recap, MAKE THESE GINGERBREAD CUPCAKES!

Gingerbread Cupcakes
Thanks-for-Visiting-Fall-Banner-2

Original article and pictures take http://www.ladybehindthecurtain.com/gingerbread-cupcakes/ site

No title

The party plans for my two younger children never quite came to fruition. We celebrated an April and a May birthday in July with a few close friends (whom we called at the last minute!) With all the renovations, I just couldn't get my act together. Since we had promised the kids, I managed to throw a small swim party together; easy and outdoors!

The good news was that I had already collected most of the things for their themed parties. These large chocolate fish, found at Wal-Mart during Easter, prompted the fishin' theme for my son's party. Since I didn't need them right away, I waited until after Easter to purchase them. They had tons of them, and I doubted people were filling their Easter baskets full of chocolate fish. Plus, they would be on sale!

Wal-Mart also had these chocolate bunnies with fish and red and white bobbers. I set the bunnies aside and used the other chocolates. I had cut down a bunch of bamboo to make fishing poles and had planned to hang the fish and bobbers from fishing line to give as party favors. Unfortunately, I never got around to it! Just passing along the idea...it seemed like a good one!

via

Another idea I had was to get some maps of Lake Wylie or sketch a simple one and put copies in the baskets. It didn't happen, but thought I would share! I saw on one Pinterest site, someone also made up fake fishing licences. That would have been cute, too!

Another cute idea from Pinterest was to put these gummy worms in plastic cups of crushed Oreos, to look like worms in dirt. So cute! Time was an issue, so I put these in clear bags with labels purchased at Hobby Lobby.
Swedish fish were packaged the same way...

...as were the peanut butter sandwiches. Another idea I had was to use a cookie cutter shaped like a fish to make the sandwiches...as you see, I did not find one because of so little time. Later, I saw that they actually make goldfish shaped bread! Good to know if you are planning a fishin' party!

This idea was found at Pinterest, as well. I bought the cupcakes from our local grocery store with blue icing. I added the fish, pretzel and fishing line, made with white icing.

I didn't have a good picture of the little fishing creels, but here you can see them, as the boys eat their lunch. I found these at Hobby Lobby...a bit pricey, so I waited until the baskets were 50% off.

The baskets were lined with newspaper and filled with a sandwich, Goldfish crackers, a drink, chocolates and candy. These served as the party favors, too! Because I packaged each lunch individually, it made things much easier! I made them ahead of time, so there was no stress prior to the party and very little clean-up.

While we didn't actually do any fishing, the boys did swim with the fish, went canoeing and splashed around.
Simple and easy. To see my 'Gone Fishin' Board on Pinterest, click

For my daughter's belated celebration, we made picnic baskets. These served as their lunch, as well as party favors. I had purchased the Lilly fabric from Ebay a long time ago, to use for making quilts for my daughters. I had so much, that I cut squares for each of the few baskets. The baskets were clearance items after Easter at Michael's. I think I paid fifty cents each. This eased my conscience, because of the price of the fishing creels!

These little gingham party favor boxes also came from Micheal's around Easter. I filled each with fruit.
These adorable Lilly Pulitzer animal crackers from Hobby Lobby prompted the theme for the Lilly Picnic.
I filled the baskets with the fruit, a sandwich, the animal crackers, juice (pink, no less,) a ring pop, bubbles and a pink and green notebook.

I had the pink and green flower cupcakes made at the local grocery store. We spread a large blanket out on the lawn, handed each child a basket and had a very simple picnic! Easy to prepare and easy clean-up! Most importantly, we kept our promise!

Thanks for stopping by for these belated parties!

Save

Original article and pictures take http://threepixielane.blogspot.com/2012/09/two-parties-fishin-and-lilly-picnic.html site

понедельник, 1 января 2018 г.

Pizza Calzone

Tuck favorite pizza fillings between layers of tender crust, and save the pizza sauce for dipping. It's so easy with Pillsbury® refrigerated pizza crust!

Ingredients

Steps

Hide Images

  • 1 Heat oven to 375°F. Lightly grease 12-inch pizza pan. Unroll 1 can of dough; placing in greased pan. Starting at center, press out dough with hands to edge of pan. Layer pepperoni, mushrooms, olives and provolone cheese over dough.
  • 2 Unroll remaining can of dough. Press out dough on work surface to form 12-inch round. Fold dough in half; place over provolone cheese and unfold. Press outside edges to seal. Cut several slits in top crust for steam to escape. Sprinkle with Parmesan cheese.

Expert Tips

  • Did you know? Pillsbury has a gluten free pizza dough.
  • Vary the calzone filling with your favorite pizza ingredients. Try an all-veggie version with chopped broccoli, bell peppers and onion with shredded mozzarella and Parmesan cheeses.

Original article and pictures take http://www.pillsbury.com/recipes/pizza-calzone/5f503393-72f1-4a5d-ae7b-2ae14969e8dc site

No Encore Just Yet

ube-butter-cream-cake_rs.JPG

In my Top 10 for August 2005, I list the ube cake from Red Ribbon as one of my favorites. I grew up on this cake, a staple at all family get-togethers because my lola (grandmother) was (and still is) crazy about it. The best thing about it is that the cake tastes the same now in my 30s as it did when I was a teenager, soft and gently redolent of ube, with a resplendence of velvety frosting.

Ube (OO-beh) is a purple yam, a tuber used in Filipino rice cakes and desserts. Obviously, its color tends to turn food it’s mixed in with, a Barney-the-dinosaur shade of purple. Quite unique really, since how many foods can you name that are purple?

An ube cake, on the other hand, gets its remarkable color (depending on the recipe used) from a large dash of violet food coloring, ube powder, and some of the actual rootcrop. It’s essentially a chiffon cake that has a filling and frosting made from ube buttercream, although I’ve seen some recipes that actually use melted ube ice cream or ube jam (haleya). That this cake has an intoxicating aroma of ube is another plus. Ube cake is not regularly found in local bakeshops nor is it found on restaurant menus.

So I’m ecstatic when I come across a home baker, Minnie Fong, whose specialty is ube cake, or ube macapuno chiffon cake (P500/9”) as she calls it. Minnie’s baking business, Encore! Desserts, has a limited but sufficient product line that consists of pound cakes, choco-mint cupcakes, and a strawberry cake with crème chantilly. Of course I waste no time ordering the ube cake and the lemon pound cake with dark chocolate glaze (P450/loaf).

Refreshing in its lack of adornment, I marvel at how smooth the ube cake’s buttercream is. It cuts cleanly, revealing its thin filling of macapuno (sport coconut). The cake itself has decent flavor but its dryness mars its appeal. What ruins the cake for me however, is the buttercream. By definition, buttercream must use butter; a light and creamy frosting made with powdered sugar and a liquid (usually milk or cream) and sometimes egg yolks for color and lushness, it’s uncooked and can be flavored in a myriad ways.

So, though the buttercream used here is smooth in appearance, its taste is quite its antithesis. It coats my tongue in a most unpleasant way, conveying a feeling of pastiness. I rub my tongue on the roof of my mouth trying to diminish the unpleasantness. I suspect that since the buttercream lacks the rich flavor and melting qualities associated with real butter, I suspect that Minnie has used margarine and/or shortening instead. When asked, she confirms that she uses margarine in the buttercream and I am disappointed.

I know that some bakers don’t use butter in their buttercream for various reasons ”“ cost-cutting or the longer staying power against the humidity, especially if it’s a wedding cake, etc ”“ but it’s disappointing. Butter melts quickly and completely from body heat, so it has a pleasing mouth feel. Margarine, on the other hand, has all the disadvantages of butter without the flavor advantage, and it melts incompletely leaving nothing but a disappointing, very waxy mouth feel.

lemon butter pound cake (1)

The lemon pound cake with dark chocolate glaze (P450/loaf), when cut, uncovers a striking contrast between brown and yellow, chocolate and lemon. The brightness of the yellow is almost staggering ”“ how many lemons and eggs would you have to use to achieve such a startling hue? The tight, almost stiff crumb is rendered immovable by the stern chocolate glaze. I taste nothing but an artificial lemon flavor, similar to Halls honey-lemon cough drops. Minnie says the flavor is due to lemon oil.

I’m alarmed at my reaction to these two desserts so I bring them to four foodie friends that I trust, which include a noted chef and a pastry chef in a popular restaurant. Without saying a word, they echo my sentiments.

At this point, you may be wondering why I even bother to devote a post about two desserts whose descriptions are less than flattering. My point is to be objective and honest. I’ve ordered desserts from some home bakers that were atrocious — there was nothing I could say about them because they were so bad. But with these desserts from Encore!, it’s just a matter of tweaking a few techniques, changing a few ingredients and I’m confident they’ll be a success. I also think these desserts are worth writing about because well, you might prefer margarine in your buttercream, who knows? I’ve given Minnie a few suggestions and she’s been more than receptive. She’s told me, “… future orders I have will definitely be the improved version.”

Encore! Desserts by Minnie Fong
0917.5183720
encoredesserts@gmail.com
http://encoredessertery.blogspot.com/

Original article and pictures take http://dessertcomesfirst.com/archives/467/ site

Make-Ahead Lunch Wraps…So Simple!

Lunch wraps are nutritious, hearty, and completely adaptable to whatever your family might like in them!

Lunch wraps are nutritious, hearty, and completely adaptable to whatever your family might like in them!
It’s a curious thing how my blogging works most weeks.

I find myself “writing” elaborate, detailed posts about a parenting issue or a book I’m reading or even a theological issue from time to time in my head A LOT. Sometimes I even start jotting notes down throughout the day. But, rarely do those meaty posts come to fruition (except occasionally like this one or this one). Nope. Those take creative, quiet, unhurried space…and I figure I’ll have more and more of that at some point.

Right now, blogging has to quickly and practically intersect with my everyday life. And I’ve made my peace with that, mainly because I know a lot of you. And you’re right where I’m at. You want simple, healthy recipes that your kids won’t groan about. You’re trying to do your best to feed yourself something nutritious, too, if you can manage.

So, in practicality, blogging looks like this for me right now:

I’m usually throwing together a quick lunch or dinner, say Lunch Wraps for instance. Lunch Wraps have been a staple in my Freezer Club (thanks to my friend, Darcie!) and around our house for years. So, the thought strikes me halfway through making them for lunch one day, “I can’t believe I haven’t put these on the blog yet!”

Meanwhile my kitchen is a holy mess and my family is patiently waiting for their food…and I decide I need to take pictures of the dish.

My kids know the drill. So, my 6-year-old daughter runs to get me some place mat options off my desk. I grab my camera. And we meet on the back porch, as she offers me ideas of where to shoot from to get the best light. (What can I say? She’s a cool kid and will be an infinitely better blogger and photographer than I am some day.)

And that’s how Make Ahead Lunch Wraps on Thriving Home are born. It’s very technical, you see.

Lunch wraps are nutritious, hearty, and completely adaptable to whatever your family might like in them!
Now, a few pithy notes are in order before I share the SUPER complicated (or not) Lunch Wraps recipe. Because they deserve it.

a. Cheap.

b. Uses up leftover rice and beans of any kind.

c. Fast to prepare. Easy to grab and go.

d. Healthy and will keep you satiated.

e. Great for lunchboxes. Send them hot and wrapped in foil. I write more about that concept here.

f. Freezable! (Our favorite way to save time, as you may have guessed from all these healthy freezer recipes.)

See why my friends and I have made Lunch Wraps for years? Hey, join the club.

Lunch wraps are nutritious, hearty, and completely adaptable to whatever your family might like in them!

Make-Ahead Lunch Wraps

Description

Lunch wraps are nutritious, hearty, and completely adaptable to whatever your family might like in them! Make a batch and freeze them for a delicious lunch!

Ingredients

  • 6 8-inch whole wheat or multigrain tortillas
  • 1 cup brown rice, cooked
  • 1 cup black or kidney beans, cooked or canned (drained and rinsed)
  • 1 cup corn, frozen or canned (drained)
  • 1/2 cup salsa (your favorite kind)
  • 1 cup shredded cheddar cheese

Notes

Freezer Meal Instructions:
To Freeze:
Assemble lunch wraps as recipe states. After tortillas are wrapped in foil and before baking (Step #2), place in a freezer bag and freeze for up to 3 months.
To Prepare:
To heat from frozen, add about 10-15 minutes on to baking time (so total baking time is about 25-35 minutes). Or remove foil, wrap in a moist paper towel, and microwave in 30-60 second increments until heated through.

Original article and pictures take http://thrivinghomeblog.com/2014/10/make-ahead-lunch-wraps/ site

Chocolate Buttercream Frosting Recipe

This truly is the best chocolate buttercream frosting recipe ever. You’ll have to read on to see my secrets! I can’t believe that it’s tak...