All images, unless otherwise provided, are copyrighted to their respective owners. We never exercise the rights to these images. In the event that there is a problem or error with copyrighted material, the break of the copyright is unintentional and noncommercial; and the material (images) will be removed immediately upon request and presented proof.
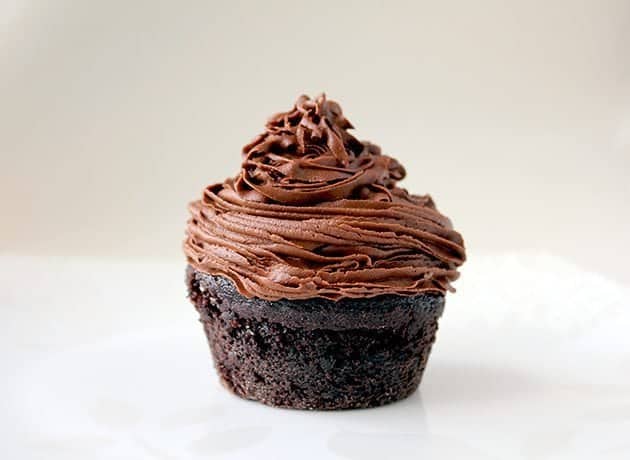
Simple and sweet, this tasty treat is perfect for getting kids involved in baking.
Source: Mad Hungry, October 2010
Wooden Spoons
Ingredients
Directions
Reviews
15 DEC, 2012 I loved these cupcakes but some people just wouldn't eat them or would remove the marshmallow-- I thought they were going to be a hit but they weren't. Maybe it would work well with a less picky crowd or with one that likes marshmallows. Very good cake though, I'll make the cake again for sure. It says 18 cupcakes but the batter was enough for 21, I could have even stretched to 24 if it was necessary. Reply
3 NOV, 2012 I made this recipe because I had a lot of "Jumbo" Marshmellows to use and this recipe came up when I did a search. Unfortunately, I did not watch the video first otherwise I would have noticed that regular size marshmellows were used. The cupcakes came out fine but the jumbo marshmellows are a bit overwhelming. Reply
2 SEP, 2012 I used this recipe because it looked easy and didn't involve the extra steps of frosting. I made the cupcakes with my young kids. Very simple and very cute! I'm not a huge cake fan, so I added 5~ chocolate chips to each cupcake to make them richer. I didn't have any problems with the marshmallows. We melted chocolate then spread it onto graham cracker quarters and stuck one into each cupcake. 'Smores cupcakes! What's not to love?! Reply
i used this recipe because it looked like an easy chocolate cupcake recipe and it was! its great not having to cream the butter and sugar..sometimes you just don't have time. I also substituted the sour cream for cream and 1 tbsp of vinegar, i also forgot to add the eggs! but because of the butter and vinegar i added they turned out fine! they turned out fluffy, moist and fudgy so so good everyone at the morning tea loved them! Reply
3 FEB, 2011 The marshmallows are the only thing I found challenging about this recipe. They don't flatten like the picture until they are left in a "off but still warm oven" for about 10 minutes. So, I broiled all of them and then put them back in the oven until they squished like the picture. Don't try to flatten them with a spoon, they just stick, a hand works best. Reply
3 FEB, 2011 I made these cupcakes on a whim and they turned out very well. I made them with my 5yr-old and 2 yr-old and there were plenty of steps that they could help with. I was out of all-purpose flour so I substituted cake flour but they came out fine. The batter was pourable (possiblely more so than normal due to the cake flour?) and if I make them again I will pour the batter from a 2 cup liquid measuring cup into the cupcake liners. Reply
I think I gave my husband diabetes when I made these. He ate 4 in about 10 minutes. I've tried a few different recipes and I think this one takes the cake, er, roll.... Anyway, for a cinnamon roll, they are fast to make. Just over an hour. Not bad, right? I found the recipe here and she has an divine looking variation on the recipe for caramel apple cinnamon rolls. I'm dying to try them! Get ready, Mr. G! For convenience, the recipe is below. Ingredients: Dough: 1 C milk (whole would be awesome) 1/4 C butter 3 1/2 C all-purpose flour, divided 1/4 C sugar 1/2 tsp salt 1 envelope instant yeast, or 2 1/4 tsp 1 egg Filling: 1/2 C sugar 1/2 C brown sugar 3 Tbsp cinnamon 1/2 C butter complete softened (not melted) Cream Cheese Icing: 1/2 butter, softened 1/4 cream cheese 1 1/2 C powdered sugar 1-2 Tbsp milk (if needed) Directions: Combine milk and butter in a microwave-safe bowl. Heat on high for 1 minute, then remove and stir. Continue heating in 20 second intervals, pausing after each to stir, until the butter is melted and the milk is warm to the touch but not hot. If needed, let the milk mixture sit for a few minutes until it is warm but not hot. In the bowl of a stand mixer fitted with the dough hook attachment, add 3 cups flour, yeast, sugar and salt. Stir by hand to combine. Add the egg and milk mixture, and beat on medium-low speed until combined. Add the remaining flour, 1/4 cup at a time, beating after each addition until incorporated. When the dough begins to form a ball and pulls away from the sides of the bowl, you have added enough flour (I used all 3 1/2 cups). Continue beating for 5 minutes on medium-low speed (speed 2 on the KitchenAid). Remove the dough hook and cover the dough with a damp towel and let rest for 10 minutes. Meanwhile, make your filling by mixing together sugars and cinnamon in a bowl until combined. When the dough is ready, turn it out onto a floured work surface. Then use a floured rolling pin to roll the dough out into a large rectangle, about 14 x 9 inches in size. (If you want all edges to be even, you can use a pizza slicer to cut the dough into a perfect rectangle, but that's a little OCD for my taste). Use a knife or pastry spatula (or fingers) to spread the softened 1/2 cup of butter out evenly over the entire surface of the dough. Then sprinkle evenly with the cinnamon and sugar mixture (use all of the mixture! It's what makes these so tasty!)
(My stupid blurry iPhone....)
Beginning at the 14-inch edge, tightly roll up the dough. And then give the final seam a little pinch so that it seals. Use a piece of dental floss* to "cut" off the two ends of the roll (just a centimeter or so) so that they are even. Then cut the remaining dough into 11 or 12 equal pieces. (11 rolls seem to fit in a pie plate, while 12 rolls fit in a rectangular pan. I had a few more than 12).
(*To cut dough with dental floss, simply break off a piece of floss about 12 inches long. Then very carefully slide the middle of the floss under the dough to the place where you want to "cut". Then pull the ends of the floss up and cross over the top of the dough. Then give a quick tug to literally cut all the way through the dough. This is the best method for not squishing your dough while cutting it -- although the standard knife method still works too.) Place each of the cut cinnamon rolls into a greased pie plate or 9 x 13-inch baking dish. Then cover again with a damp towel, and leave the dish in a warm place to rise for 25 minutes. While the dough is rising, make the icing (instructions below). When the rolls have risen, uncover the dish. Then place on the center rack of the oven and bake at 350 degrees F for 15-20 minutes, or until the rolls are golden and cooked through. Remove and let cool on a wire rack for at least 5 minutes. Drizzle with your desired icing and serve.
Icing Directions: Either in the bowl of an electric stand mixer, or a mixing bowl, beat softened butter and cream cheese together until combined. Then beat in powdered sugar until combined. If the icing is too thick, add a tablespoon or two of milk to thin.
Hurry - once it's sold this opportunity will be gone!
Besides being memorable, .com domains are unique: This is the one and only .com name of its kind. Other extensions usually just drive traffic to their .com counterparts. To learn more about premium .com domain valuations, watch the video below:
Turbocharge your Web site. Watch our video to learn how.
Improves Your Web Presence
Get noticed online with a great domain name
73% of all domains registered on the Web are .coms. The reason is simple: .com is the where most of Web traffic happens. Owning a premium .com gives you great benefits including better SEO, name recognition, and providing your site with a sense of authority.
Here's What Others Are Saying
Since 2005, we've helped thousands of people get the perfect domain name
First time doing this type of transaction. Process was fast and easy.
Fast serious professional easy all a customer wants! Thank you - salvatore vara, 12/10/2018
Very good services and fast tranfer , I am very happy thank you very much - phuong nguyen, 12/5/2018
I tried fried sushi last year when i was visiting my family in MO. We went out with my sisters. They had this sushi place it was so beautiful inside. I only seen in movies such a beautiful restaurants. I made sushi before, just not fried. So then we made fried sushi at my moms house. They had this sushi sauce in the restaurant that became our favorite.
To make rice you will need:
2.5 cups uncooked sushi rice
2.5oz rice vinegar
3 oz mirin
1 or 2 tbls sugar
It makes 6 rolls
For filling:
Cucumbers
Cream cheese
Smoked salmon or Crabs
Red bell pepper
Sushi nori
Sushi mat
Oil
Sauce: ( this is our favorite sushi sauce)
2 tbls Mayonnaise
Sriracha hot chili sauce desired amount to make it spicy
1/4 tsp toasted sesame oil Print option
This is the sauce ingredients: Mix 2 tbs mayo with a few drops of toasted sesame oil and hot sriracha chili to your taste.
Mix eggs in a bowl.
Cut all the the other ingredients in strips.
Cook rice, salt water.
Put cooked rice in a bowl add Mirin, sushi vinegar,sugar. Mix well. Cover with wet paper towel.
Place nori shiny side down. Dip your hands in water. Get rice, spread it over nori leaving the closing side. Place all ingredients in the middle.
Roll lift the edge up and over the filling. (watch the Video)
Tuck the mat tightly into a roll. Pull back to tighten the roll. Water the edge of nori. Roll all the way.
First roll sushi in the flour.
Next roll in eggs.
Then roll in panko.
Put in boiling oil.
Boil em for a few min on high turn on the on other side.
Take it out and place it on the paper towel for a few min.
Enjoy warm!!!
How adorable are these? And, being a cheesecake – they’re as delicious as they are adorable. They are a relatively quick and easy dessert to put together, and are super impressive. Everyone loves things served in cute individual portions!
I’ve been making these little guys for a couple years now. While the raspberry swirl is my favorite, I’ve also successfully made them with blueberry and strawberry as well. A perfect sweet treat to wrap up these summer days. Can you guys believe summer is almost over? It seems the older I get, the quicker time flies. Slow down with some cheesecake, ya’ll. Have a great weekend!
Raspberry Swirl Cheesecake Cupcakes
For the crust:
3/4 cup graham cracker crumbs
2 Tbsp. unsalted butter, melted
1 Tbsp. sugar
1/4 tsp. cinnamon
For the raspberry swirl:
6 oz. fresh raspberries
2 tbsp. sugar
For the filling:
1 lb (2 packages) cream cheese, softened
3/4 cup sugar
Pinch of salt
1 tsp. vanilla extract
zest from 1/2 lemon
2 large eggs, at room temperature
Preheat the oven to 325 F. Line cupcake pans with paper liners.
In a small bowl, combine the graham cracker crumbs, melted butter, sugar, and cinnamon. Stir together with a fork until well blended and all the dry ingredients are moistened. Press 1 tablespoon of the mixture into the bottom of each cupcake liner. (Use a small drinking glass to easily and evenly press the crumbs down) Bake until just set, 5 minutes. Transfer to a cooling rack.
To make the raspberry puree, combine the raspberries and sugar in a blender or food processor. Process until smooth, then pour through a fine mesh sieve to remove the seeds.
To make the cheesecake, beat the cream cheese on medium-high speed in the bowl of an electric mixer until fluffy. Blend in the sugar until smooth. Mix in the salt, vanilla, and zest. Beat in the eggs one at a time, mixing well after each addition.
To assemble, spoon 3 tablespoons of the cheesecake batter over the crust in each cupcake liner. Dot a ½ teaspoon of the raspberry puree in a few dots over the cheesecake filling. Use a toothpick or a wooden skewer to lightly swirl and create a marbled effect.
Bake until the filling is set, about 22 minutes, rotating the pans halfway through baking. (They will look quite puffed initially but will return to normal quickly.) Transfer to a wire cooling rack and let cool to room temperature. Transfer to the refrigerator and let chill for at least 4 hours before serving.
Bundt Pan Roasted Chicken & Vegetables is a savory supper of crispy chicken and tender root vegetables made in a bundt pan!
This post may contain affiliate links.
It’s a roasted chicken & vegetables kind of day!
‘Tis a dark & stormy Sunday – well, overcast and drizzly anyway – and since we got our yearly fireplace inspection and sweep this weekend (locals: we’ve used Alpine Chimney for 2 years in a row – they’re great!) Ben was able to strike up the first fire of the season this morning and let it roar all day long. Cozy!
I was listening to the logs snap and crackle while browsing the weekly ads with coffee this morning, when I saw whole chickens were on sale at the grocery store for $6.99. I immediately knew the only way this lazy Sunday could get any better, would be if I were to roast one of those chickens with hearty veggies, then serve ’em up hot and crispy.
Well, I suppose it could have been better if the chicken magically appeared in my refrigerator, rather than having to go out and get it, oh, and if I didn’t have 36 loads of laundry to do – but you know what I mean!
This was my first time roasting a chicken and it was soooo much simpler than I ever imagined. Rinse, pat, brush, season, roast. That’s it! Pair with hearty red-skinned potatoes, carrots, onions, and garlic, and you’ve got a feast in a bundt pan. Yeah, I can’t wait to show you this roasting method using a bundt pan. It’s semi hilarious, but lets the chicken get deliciously crisp on all sides. So mouthwatering!
Start with those aforementioned vegetables: 2lbs red-skinned potatoes, 3 medium carrots, and 1 onion – all chopped into bite-sized pieces. Add them to a big bowl with 6 garlic cloves.
Next drizzle in 2 Tablespoons extra virgin olive oil and season liberally with salt & pepper, then toss everything to coat and pour the veggies into a non-stick sprayed bundt pan. If you don’t have a bundt pan, a roasting pan, foil-lined baking sheet, or 9×13 casserole dish should work fine!
Next turn your attention to the chicken – this here is a 4lb chicken. Unwrap then rinse inside and out under cold running water, then pat it dry with paper towels.
I couldn’t help but feel like I was washing a baby during this process. My 4lb bundle of joy!
Season the inside of the chicken with salt and pepper then stuff it with 4 garlic cloves, and 1 lemon cut in half.
Next, invert the chicken over the top of the bundt pan. Isn’t this the best idea? I saw it on Real Simple last year and have never forgotten it. Roasting the chicken straight up and down ensures that the skin gets crispy on ALL sides!
Brush the entire chicken with 2 Tablespoons melted butter, season with more salt and pepper, then roast for 50-60 minutes at 425 degrees, or until a thermometer inserted into the thickest part of the thigh reaches 160 degrees. When it’s done, remove the chicken to a plate to rest for 10 minutes before carving.
My veggies needed a bit more time (I cut the potatoes a wee bit big,) so while the chicken was resting I cranked the oven to 450 degrees and let ’em roast for 10 more minutes in the bundt pan. PERFECTION!
There are few things as delicious as slow-roasted chicken. That sizzling skin is crispy, buttery, and so. freaking. good!
While the outside is crisp, the inside is moist, juicy and tender, with a faint garlicky flavor. MMM!
Ben and I both went crazy for the roasted veggies. While some were crisp and golden from roasting on top, others were decadent and creamy from slow cooking in the juices from the chicken. I can’t even.